Since the launch of windows 7, indeed many have been upgraded or are switching from windows xp or vista to windows 7. Many of the considerations which make the user moves from the operating system it uses. Some include new features and also the level of the speed of loading and working process of Windows 7 for more and better. However, not all Windows XP users can switch or upgrade to Windows 7, because to be able to use windows 7 there is a minimum requirement on the specifications of the computer. Namely:
1. 1GHz processor or better 32-bit (x86) or 64-bit (x64)
2. 1GB of RAM for 32-bit or 2GB of RAM for 64-bit
3. 16GB hard disk space for 32-bit or 20GB for 64-bit
4. DirectX 9 graphics with WDDM 1.0 devices or more
We recommend that prior to upgrade or install windows 7, first check the computer specs friends using windows 7 upgrade advisor for computer knowable ngedukung friend or not to upgrade or install Windows 7.
Now for you who is loyal to the same Windows xp or windows 7 but wanted to specification does not support and want to look like windows 7 can be done by installing the Windows 7 theme for windows xp. The result looks friendly computer will be Windows 7 but systemnya still windows xp.
1. Download and extract the files SevenVG RTM Theme for Windows XP by Vishal (6.5 MB) Guptapada link below:
http://www.microsoft.com/windows/windows-7/get/upgrade-advisor.aspx
2. After extraction there are 5 folders: the Extra Common Tasks, Fonts, Iconized Taskbar Hack, Styler Toolbars and Themes
3. Run "Theme.exe" file to install theme windows 7 to windows xp, then activate the theme through the settings in Desktop Properties on the themes tab.
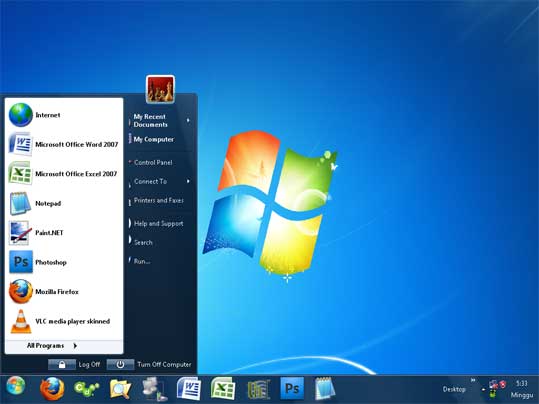
Then the display will change to windows xp as below:
 Related search:
Install of Windows 7 a minimum requirement, minimum specifications of Windows 7 computers to install, migrate to windows 7, the download of Windows 7 upgrade advisor, theme of Windows 7 to windows XP, Windows XP to Windows 7 of Windows 7 for XP themes, download themes of Windows 7 to XP , Download windows 7 theme for windows xp, download SevenVG RTM Theme for Windows XP by Vishal Gupta
Programs or applications that have been installed in the computer will usually be included in the list of all programs on the Start menu. So to open a program or application is also through the all programs on the Start menu. Although there is a quick way to open an application or program by creating a shortcut key that can be made through the properties of each program. Another quick way to open a program or application is to open a program via the icon on the desktop or quick launch icon on the program on the taskbar.
If friends do not want to use all programs on the Start menu, or want to prevent others from opening all programs, then all programs in start menu can be hidden. To hide or eliminate all programs on the Start menu can follow the following steps:
1. Open the program group policy in a way from the start> run> type gpedit.msc> press enter
2. After the group policy window appears, click on the user configuration administrative templates
3. Double-click the Start Menu and Taskbar
4. In the right panel go to the bottom, then double click on the Remove All Programs List from Start Menu
5. In the window that appears, select Enable and click OK
6. Close the windows group policy
7. Log off or restart the computerNow after opening the start menu, then all the program has not appeared again. If the previous menu on the computer all the program does not appear or not appear, then to bring all the missing program can be done by adjusting remove all programs from start menu list to be Not Configured or disabled.
Related search:
All programs menu is not visible or disappear, allowing a program that lost all the menu, hide all program menu on the start menu, quick way to open a program, create a shortcut key of a program, restore all the lost programs